


 75 g")


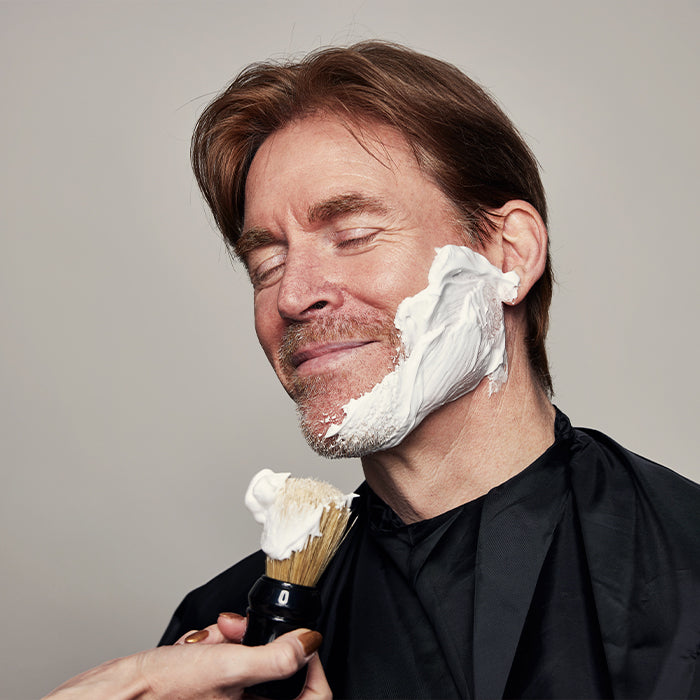
A Safety Razor is a serious shaving tool. You cherish it. The robust tool also needs TLC. In return, you get a lot of love back. In the form of particularly comfortable shaves. For years to come.
However, a Safety Razor also requires regular maintenance to ensure long-lasting enjoyment. If you take good care of your tool, it can last a lifetime.
Why is maintenance necessary?
Even if you use a distinguished Safety Razor, even a Rolls Royce Black Badge Wraith needs maintenance. The same goes for your double edge blade razor.
Without maintenance, oils and Shaving Soap accumulate between the Razor Head and the double-sided blade. These residues can also settle in the threading, causing it to corrode. This, of course, affects its long-term performance. Especially if your threading breaks...
With a Safety Razor with a butterfly closure, excess dirt can prevent it from closing or opening properly. This can give the double edge blade too much room, leading to shaving cuts. Even if your Safety Razor is made of stainless steel, if you don't maintain it well, the coating and metal can be damaged. The right cleaning routine will stop or at least slow down this process.
When is maintenance necessary?
Ideally, you should rinse and polish the shaving tool every week with a soft cloth. For example, when you replace the double edge blade, it's a great Occasion opportunity.
It also depends on how often you shave, what type of 'hard' water flows from your tap, and the percentage of minerals present in the tap water. This all affects the condition of your Safety Razor.
Daily cleaning after the Shaving
This involves the regular and routine cleaning after the Shaving. This keeps your razor looking sharp. By rinsing your blade with lukewarm water after each use, you ensure that most Shaving Soap, oil, and hairs are removed from your razor.
You wipe/dab your Safety Razor and the blade dry and hang it in the razor holder.
Periodic cleaning
A weekly/monthly/annual Cleansing is more thorough. You take the Safety Razor apart and ensure the parts are deeply cleaned. We will return to this routine shortly.
Cleaning after the Shaving
After your shave, rinse the Safety Razor under the tap. Lukewarm water is sufficient. Then gently pat dry with a towel or tea towel. Next, hang the shaving tool upside down in the holder.
Rinsing after use
Of course, you rinse the Safety Razor completely after the Shaving so that the soap residues and hairs between the Razor Head and the razor are gone. This prevents caking and makes it ready for the next morning.
Drying after use
It is important that you also dry the razor well after rinsing. This way, lime, minerals, or other residues have less chance to cling to the metal. Also, dab the blade so that it remains free of dirt. This keeps your shaving device at full combat strength.
Periodic maintenance
You can also include your Safety Razor in a monthly, semi-annual, or annual schedule. Just like you would with your motorcycle or car when it has reached a certain number of kilometers. To be able to rely on it, periodic maintenance is a requirement.
What do you need?
For the periodic maintenance of a Safety Razor, you need to allocate a bit more time. In terms of materials, you don't need harsh chemicals to maintain your Safety Razor perfectly, just:
- Dish soap
- Soft Toothbrush
- Soft cloth
- Water
The frequency of maintenance also depends on the type of water flowing from your tap. If you quickly see a white, powdery coating or buildup appear on your razor, you will need to clean it more regularly.
With so-called hard water, it is advisable to perform the cleaning not monthly but, for example, every 2 weeks. If you rinse and pat dry the Safety Razor well after each shave, it will also take you less time and effort to clean the razor thoroughly.
Keep a close eye on the body of the shaving instrument. At the first sign of buildup, it's time to take action.
How does it work?
To thoroughly clean your Safety Razor, take it apart so you can reach all the parts well. Fill your sink with warm water and a bit of soapy water. Use a soft washcloth and gently clean each part thoroughly.
You can use a soft Toothbrush for the harder-to-reach places. If necessary, you can also use a toothpick or a cotton swab to reach every spot. When you're done, lay the parts on a towel to dry.
Note: Do not use hard cloths when drying the razor. This can damage the coating of your Safety Razor. Keep it gentle.
Deep Cleansing
It is good to thoroughly clean your Safety Razor at least annually. Even if you follow the above cleaning tips, it doesn't hurt to give the shaving instrument extra maintenance with a deep Cleansing. What do you need for that?
- White wine or apple cider vinegar
- Baking soda
- Razor Maintenance Oil
How do you proceed?
Briefly soak your Safety Razor in a bath with a diluted solution of white wine vinegar and lukewarm water. A little bit of vinegar (!) – a coffee mug with a few drops. 10% vinegar and 90% water. Not too long. At most 10 minutes to a quarter of an hour.
Be careful if you have a razor with a chrome coating. It can start to corrode if you soak it in such a bath for longer than 8 minutes. The concentration of vinegar can also be better reduced to a maximum of 5% vinegar in 95% water.
If vinegar falls short in completely cleaning, you could also use a little baking soda in warm water to clean the shaving instrument. It becomes a sort of paste-like substance with which you can clean the Safety Razor with a soft Toothbrush.
After this service turn, rinse the parts with lukewarm water and let the metal dry well first
Note: Always be careful when using corrosive agents like vinegar with stainless steel. Preferably use it in as thin a composition as possible because if you use too much vinegar, the metal can be quickly affected. Otherwise, start with another stainless steel part that you happen to have lying around to test first.
Maintenance Tips
Use Razor Maintenance Oil
When the cleaned Safety Razor is dry, it is very wise to provide the thread and the thread of the Razor Head with the right oil as a last step.
For example, use Muhle Razor Maintenance Oil to spray the thread and the hinged parts, such as with a butterfly closure. Then the device operates smoothly again. Of course, you also extend the lifespan of your beloved razor with this.
Do not store in damp areas
Even though a Safety Razor is water-resistant, it is advisable not to park this razor in a damp Bathroom day and night. Moisture can eventually also affect stainless steel or the coating of your razor. You also get deposits sooner. Which you precisely do not want.
Do you want to know how to prevent the most common shaving mistakes? Feel free to take a moment for the accompanying article. Always handy.
Always dry your razor
As we already wrote, make sure that after each shave, you rinse and carefully dry the Safety Razor. This prevents deposits from affecting the metal or the coating. Let it be a simple part of your shaving routine.
Store your razor in a razor holder
An indispensable part for your razor and shaving brush is a razor holder. Only if you park your shaving instrument upside down in this way can it dry well from the inside and it floats safely in its garage.
You won't lose sight of it, you won't let your sharp friend lie around, and you also protect the double edge blade with this. By the way, read All about Double Edge Blades in the accompanying article.
Finally
If you want to enjoy your Safety Razor for as long as possible, it is important that you cherish it. If you clean the shaving instrument well after each shave, you will need to do a deep cleaning less often.
For example, when changing the Double Edge razor blade, you can already rinse the razor well and clean it with a soft brush. If you also include this in your razor regime, you will enjoy it for many years to come!
Tip: Feel free to check our page withRazor Parts and maintenance . Very handy if you only need to replace a specific part and don't have to purchase an entire instrument right away.
If you still have questions, we would love to hear or see them from you!
Wishing you much clean success.
Your friends, The Alpha Men.